![]() Note: Click for link to access the Temp Folder
Note: Click for link to access the Temp Folder
Imaging
- Once tablet is started up for first time, you will need to answer some basic questions: Language and location will all be US, not Canada.
- Account to use for setup
- Username: imaging@cnrl.oplynx.ca
- Password: Asdfbnm,
- If given the option to name the device, contact Rob and they will provide the correct name. If it doesn't ask, then you will need to rename it in step 14.
- Once at Windows desktop, copy over TEMP folder from USB to desktop.
- In temp folder, (run as admin) Disable_Windows_hello batch file. Need to run it as administrator to complete successfully.
- Next, double-click (do not run as admin) !INSTALL_ACROBAT batch file to install Acrobat Reader on the tablet for the pdf files included in OpLYNX.
- Next, double-click (do not run as admin) !INSTALL_SQLEXPRESS batch file. This will install SQL Express and fill in all necessary details
- This will take a few minutes to install. If it doesn't look like it is installing, it might be because you will need to check for, and install ALL windows updates to get the latest SQL update, then install SQL Express.
- Run CHROME setup exe to install Google Chrome
- Run the Citrix Workspace installer
- Then run the security certification on local machine as admin
- Once Citrix is installed, you may need to restart the tablet.
- Also run the Citrix Shortcut batch file (as admin) if the tablet is for CNRL, it will copy the CNRL Citrix shortcut to the desktop with admin privileges.
- The link should be https://access2.cnrl.com - This is found in the temp folder
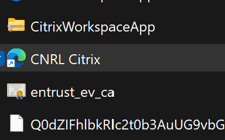
- The link should be https://access2.cnrl.com - This is found in the temp folder
- Run the Teamviewer setup file which will install Teamviewer on the desktop. Once installed, the Teamviewer window should display on the desktop. Be sure to update Teamviewer by clicking on the down arrow in the top-left corner of the window.
- This will close Teamviewer and run the update
- Install the correct version of opLYNX based on where the tablet is going (IMPORTANT).
- Check for Windows updates.
- Run updates and restart tablet.
- Go back to the updates and ensure all updates are installed - you may need to repeat this steps until all updates are installed.
Renaming an opLYNX Tablet
- Go back to the updates and ensure all updates are installed - you may need to repeat this steps until all updates are installed.
- IMPORTANTSTEP: Once updates are done, rename the tablet by:
- Typer rename in the search bar and select rename your pc to go to the renaming section.
- Look for advanced options or rename your pc advanced and you will see more options.
- Select COMPUTER NAME Tab, then click change.
- To find the next increment of the tablet name, do the following
- CIS Azure - Microsoft Intune admin centre
- Username: Abadata@cnrl.oplynx.ca
- Password: Forreddeeroffice123
- To find the next increment of the tablet name, do the following
- BE SURE TO WRITE DOWN THE ORIGINAL COMPUTER NAME SO YOU CAN FIND THE ORIGINAL COMPUTER NAME IN AZURE. YOU WILL NEED TO RENAME THE COMPUTER IN THE AZURE TOOL AS WELL.
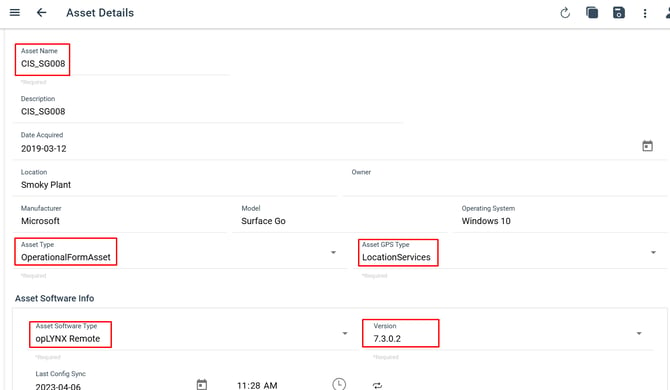
- Once the computer is correctly named, you will need to login to opLYNX Central and set it up as an asset so opLYNX works correctly.
- Login to the appropriate OpLYNX Central account
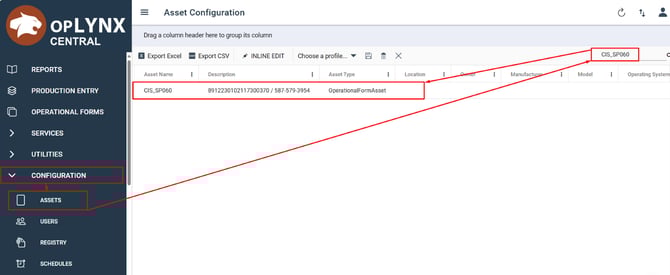
- Once logged in, open the configuration dropdown on the side menu and select assets.
- Type to tablet name in the search bar to ensure it isn't already added. If it isn't, click on the + symbol in the bottom-right corner.
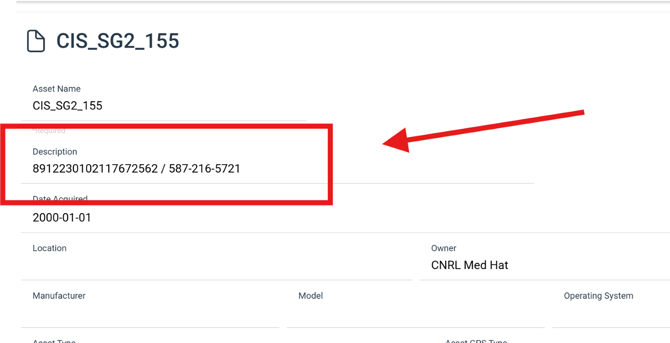
- Once you have the SIM card ready to install into the tablet, you can take the CIM and enter it under the tablet asset in opLYNX Central
- Once the SIM card has been activated (if the tablet has not been sent into the field yet), you can also go into network settings on the tablet and go to the SIM card settings and grab the Mobile number associated with the newly activated SIM card. This allows the Foreman to better track the device and the SIM card status.
How to set up a local admin account
- In search bar, type in Users -> Other Users
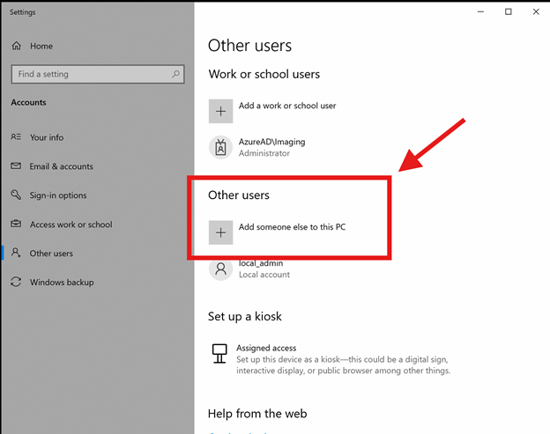
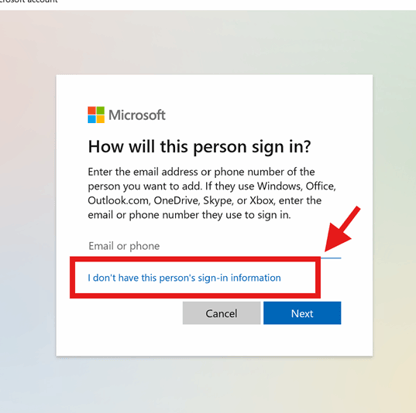
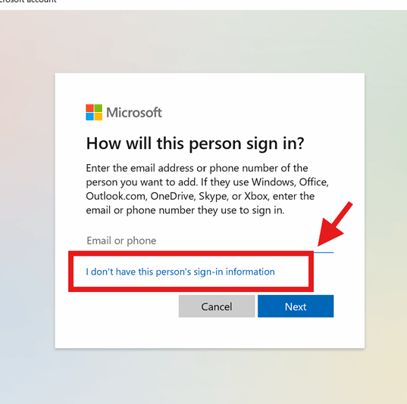
- Select I don't have this person's sign-in information.
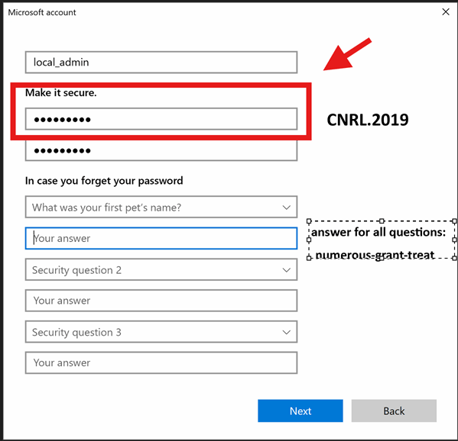
- Select Add user without a Microsoft Account
- Use the following credentials for all
Finally, back in the TEMP folder, install the correct version of opLYNX based on where the tablet is going.
- BEFORE INSTALLING: If you know the name of person who will be using the tablet, double check to ensure they have been set up as a user in Central (to access opLYNX remote) and in Azure (to be able to log into the tablet). Instructions on setting up a new user can be found here
- AFTER INSTALLING: Open opLNX Remote so that it will run any updates and open the login screen.
Additional Instructions for Surface Go3 Tablets
- If you are imaging a surface GO 3 tablet. There is some software that you might need to run to update the firmware on them.
- Download the “Go3.mobilebroadband.440 1 “zip file to the tablet. And instructions in the “microsoft-fix.txt” text file for what to do.
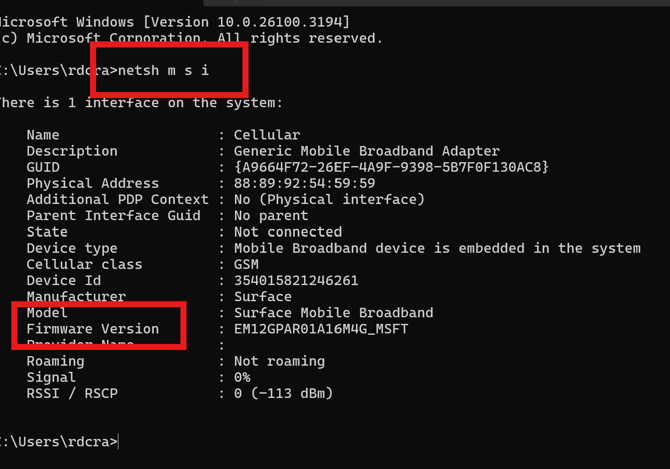
- To check to see if it already has the update, open CMD prompt (type CMD in the search bar on windows ) and type in the following: netsh m s i and it should give you the firmware version. It should be 4.40 or later. 4.36 does not work on Surface GO 3 tablets.
See the below steps to update:
- Connect Go3 to power for at least 5 minutes
- Extract the ZIP into a new folder
- Right click the .INF file and choose Install. Another way to install it is run “pnputil /add-driver <filename.inf>” in the command prompt.
- DO NOT restart/reboot the device
- Wait 15 minutes and check “netsh m s i” at a command prompt to see the modem firmware version. The version is in the long string and will end in 4.36 or 4.40. If it updated, it will end in 4.40. While the modem firmware is updating, running “netsh m s i” will show an error.
Additional Instructions for CNRL Heavy Oil Tablets
- When you setup Teamviewer on the tablet, you will also need to add a few more steps
- Go into settings on teamviewer
- Extras > Options > Advanced > Show advanced options
- Under ADVANCED SETTINGS FOR CONNECTIONS TO THIS COMPUTER > Fill out the password/Confirm password
- Use the following password - CNRL_2021!
- Once password is set in teamviewer on the tablet, go back to main screen on teamviewer
- Check START TEAMVIEWER WITH WINDOWS
- Next, open TeamViewer from your desktop, or sign into TeamViewer on the tablet using your login credentials. Add the tablet to TeamViewer (Easier from your desktop computer):
- In the left side menu of TeamViewer, Go to Computers & Contacts
- Select which area this device will go under - Bonny Tablets (for Bonnyville) or Lloyd Tablets (for Lloydminster)
- Click on ADD COMPUTER from the right side menu
- Fill out all information needed:
- TeamViewer ID will be the TeamViewer ID from the tablet (ENSURE YOU ARE SIGNED IN UNDER THE IMAGING ACCOUNT)
- Password is CNRL_2021!
- Alias is the Tablet Name (Ensure you have already re-named the tablet!)
- Ensure the correct Group is displayed
- Press OK
- Test it out by double-clicking on the tablet name under the area
3)If requested on the form, add a shortcut to the public desktop for the VTScada link (only if requested, not part of the standard order/return process): Click here for the PDF of VTScada links
- In a File Explorer window, go to C:/Users/Public/Public Desktop and add the shortcut
- If you do not see the Public Desktop folder:
- Go to Windows Settings --> Updates and Security --> For Developers
- Scroll down to File Explorer
- Check off “Change Settings to Show Hidden and System Files”
- Click on Apply (click on apply even if the above option is already checked off)
- You should now be able to navigate to C:/Users/Public/Public Desktop
4) On central, set up asset type as Mobile Broadband Asset instead of Operational Form Asset if the tablet is for Heavy Oil